
 This is the second blog of a two part blog series submitted by Jonathan Doklovic. The first blog introduced the Bamboo Release Management plugin (Part 1) and the second will provide a brief tutorial on using the plugin.
Jonathan is Founder and CEO of Systems Bliss Inc., an Atlassian Partner. Jonathan has been using Atlassian tools and writing plugins for them for over 5 years and has over 25 years of development experience.
Bamboo Release Management Plugin Tutorial

In this blog post I’m going to walk through what we believe is a standard, simple release pipeline that can be implemented in your Atlassian Bamboo continuous integration server using the Bamboo Release Management Plugin (BRMP).
We realize this process won’t fit every use-case perfectly, but it’s a solid starting point that can be built-upon (pun intended) to create a release pipeline for any software development project.
The Basic Premise
To give this tutorial some context, we will be using a fictitious project called the Atlas Demo Webapp.
We will jump into the middle of the project where development is starting on the 1.1.0 version. There is also a 2.0.0 version in the works, but no development has begun yet.
To accomplish our pipeline, we’ll be setting up 1 project with 2 plans in Bamboo.
- A 1.x Branch plan for building developer commits.
- A 1.x Trunk plan for building releases.
Our final overall development process will follow these steps:
- Developer builds and tests on a local environment.
- Once a feature is complete, the developer commits to a branch in SCM labeled with the current development version.
- Bamboo builds every commit.
- “Rinse and Repeat” the above steps as needed for the current development version.
- When feature complete, the release manager merges the development version branch into the trunk.
- Release manager kicks off a release build from the trunk in Bamboo.
- After successfully building trunk, Bamboo completes the following.
- Releases the version in Jira.
- Tags the released version in SCM.
- Branches to the next development version in SCM.
- Switches the branch plan to the new branch.
- Developers switch their working copies to the new branch and continue development.
Setting up the Branch Plan
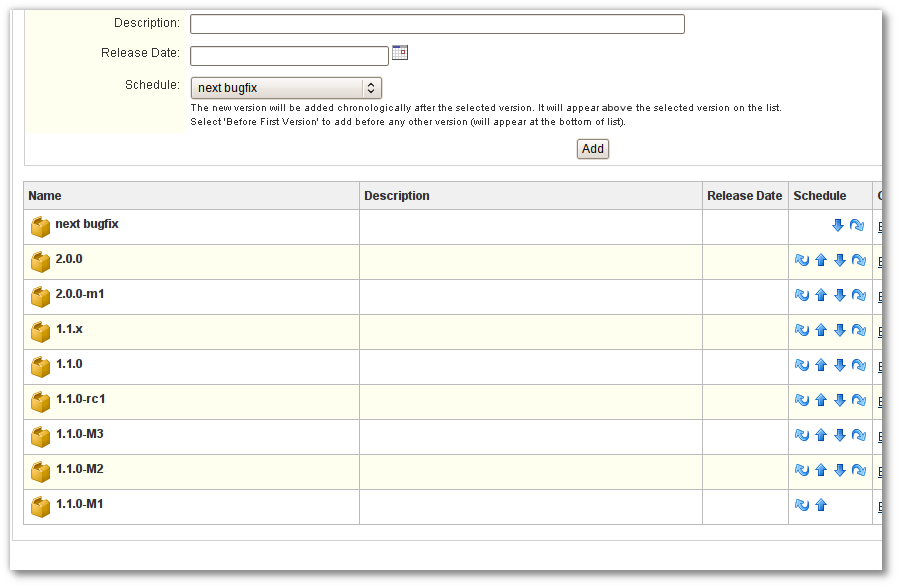
To get started, we’ll first need to have a Jira project and add the proper versions to it.
I won’t go into the details of Jira configuration here, but here’s a screenshot of the versions we’ve setup in Jira
Project and SCM Settings
Next you’ll need to setup a project in Bamboo for our builds and begin to setup the first Build Plan for our branch builds.
You can name these anything you like and we’ll assume you have made it through the basic “Details” screen in Bamboo.
Just a note, our project name is “Atlassian Demo” and our branch plan is named “1.x Branches”
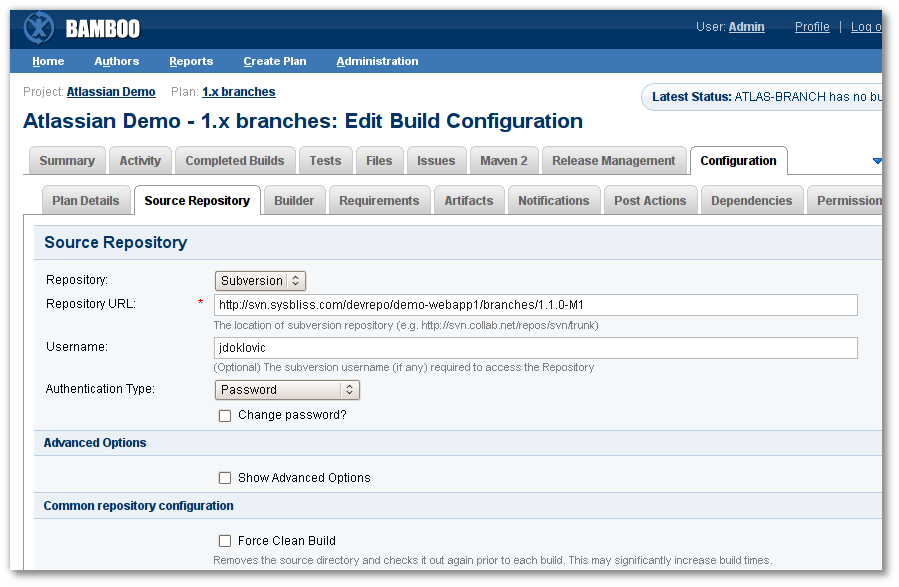
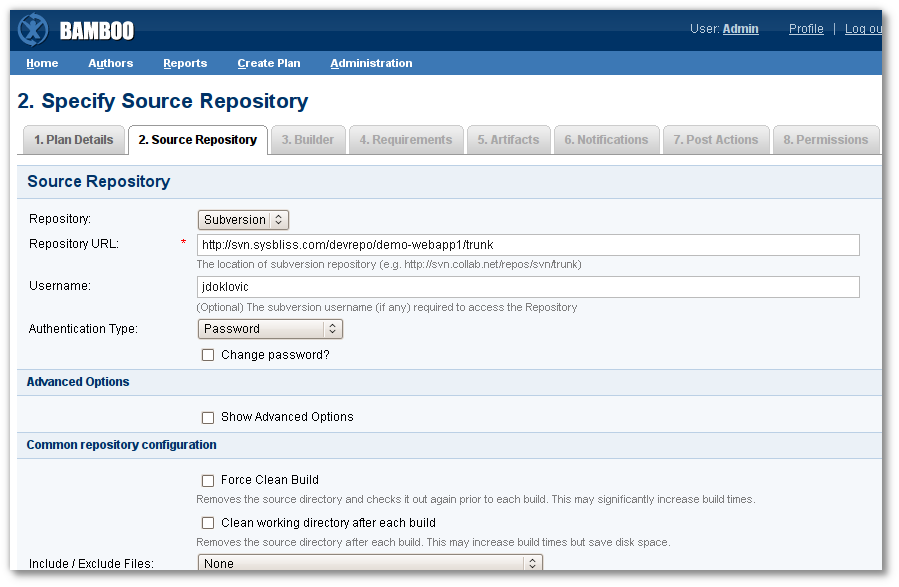
Continuing on the the “Source Repository” screen in Bamboo, we’ll point our SVN url to the first branch that we’ve manually setup.
In our case, we’re starting with version 1.1.0-M1 and so our url path is: …/branches/1.1.0-M1/
Maven Builder Settings
Moving on to the builder screen… we’ll be using Maven for our build tool and in general we just configure it as any other maven project with one tiny exception:
We pass the version number to Maven via the command-line
To do this, we’ve setup a property in our pom called ci.version.
The default value can be anything and it’s probably a good idea to use a timestamp and the developers name as the default value.
Once you create this as a Maven property, you should use it as the value of the version tag in Maven.
<version>${ci.version}</version>
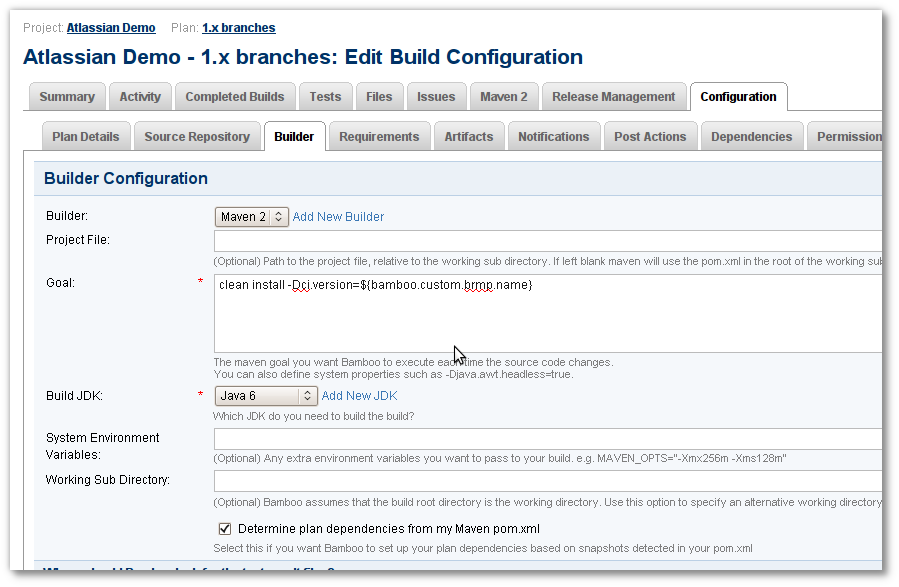
With our pom variable in place, we can now configure the Maven goals in Bamboo.
As stated previously, we do this just like any other Maven project and we pass the version number in on the command-line.
This is done by adding:
-Dci.version=${bamboo.custom.brmp.name}
at the end of our goals.
The variable is just one of many that BRMP sets during the run of a build. (more on those later).
Release Management Builder Settings
Scrolling down on the Builder screen, you’ll see a section labeled “Release Management” and we need to click the enable release management checkbox to enable it.
Once enabled, you’ll see a tabbed interface with a bunch of options and since our branch build will be the most complex to setup will break down each tab in detail.
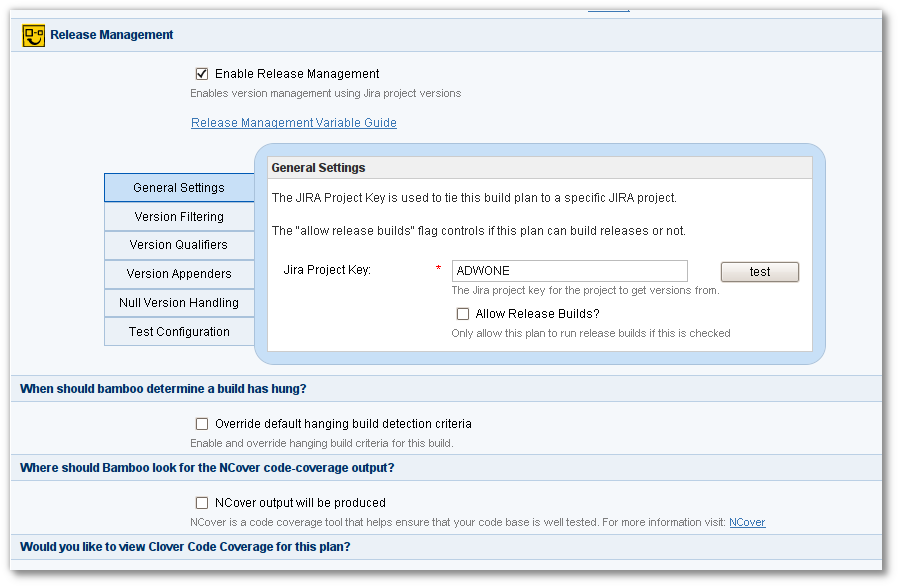
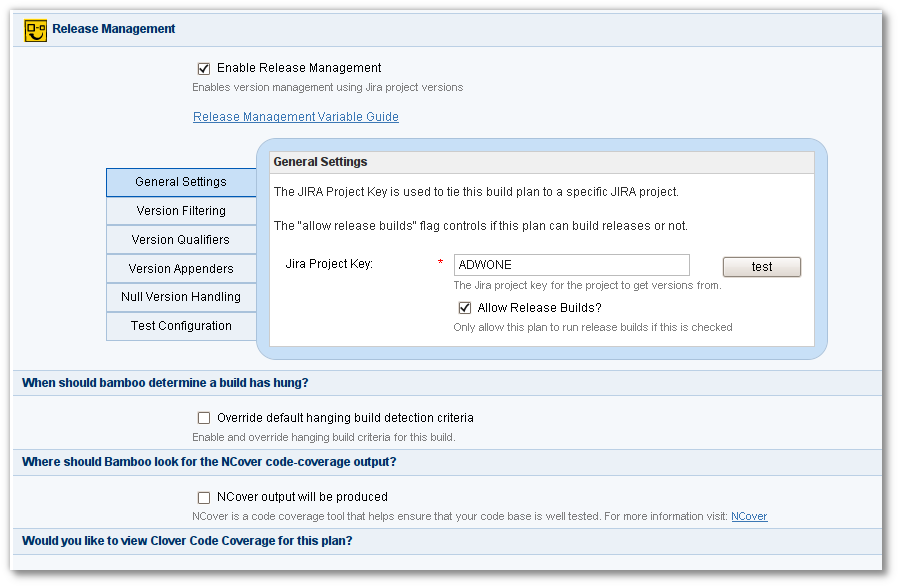
General Settings
The General settings tab is pretty, well, general. We just need to link our build to our Jira project.
To do so, just type the Jira Project key in the field provided and click the test button. You’ll eventually see a result with the status of the Jira connection.
Also on this screen, it’s important to un-check “Allow Release Builds”. This will turn off running release builds for our branch plan so that those pesky developers can “accidentally” run a release.
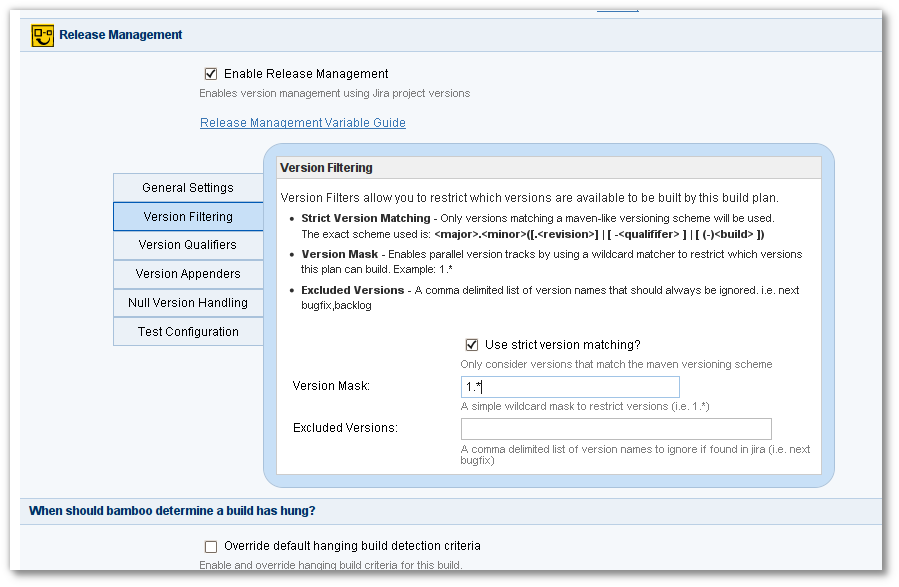
Version Filtering
The “Version Filtering” tab gives us some control over how Bamboo determines which versions from Jira are available to this plan.
Since we are following the Maven-style version numbering scheme (also used by Apache and Eclipse) we’re going to check the “Use strict version matching” box.
This will tell Bamboo to ignore anything with a version label that doesn’t fit the general version numbering scheme.
Also, since we only want to build 1.x versions and we have 2.x versions setup in Jira, we’ll add a Version Mask value of 1.*
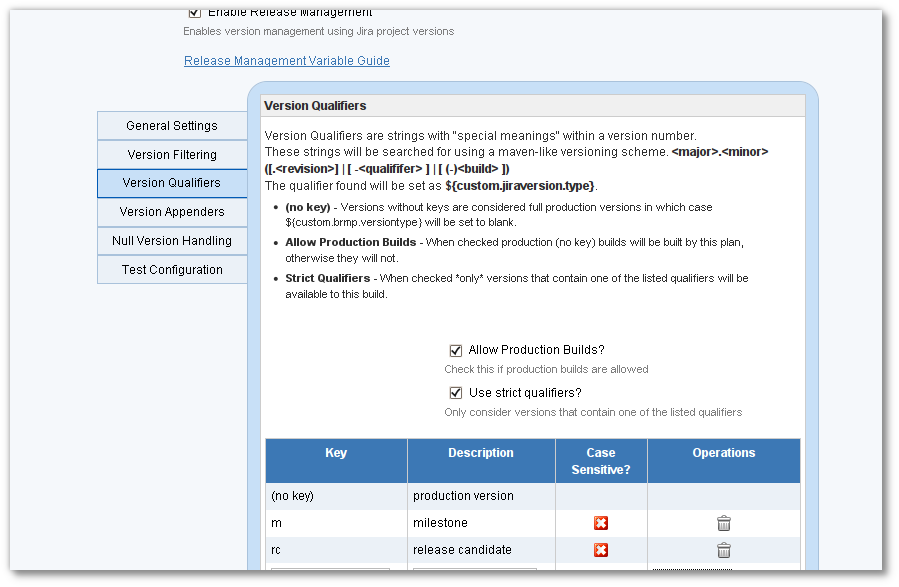
Version Qualifiers
The Version Qualifiers tab allows us to get even more granular in which versions we deem available to this plan.
In our case, we only want to allow Milestone, Release Candidate, and Production (non-qualified) versions.
This is actually a bit of overkill for our scenario, but we wanted to include it for completeness
First, we need to check the “Allow Production Builds” box. This tell Bamboo that version labels without qualifiers are allowed to be built by this plan.
Next we’ll check the “Use strict qualifiers” box which tells Bamboo that only version labels that contain the qualifiers we specify are allowed to be built by this plan.
And of course, we need to specify the qualifiers.
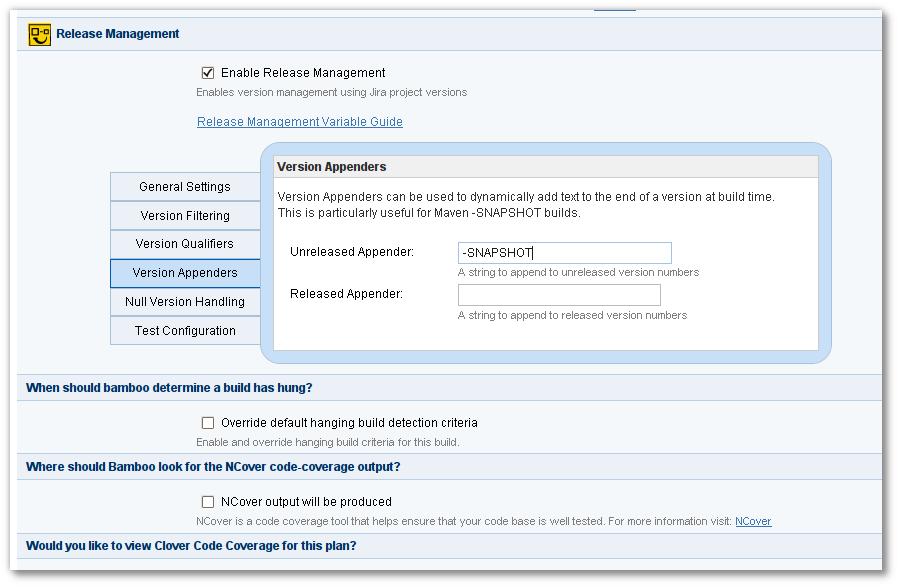
Version Appenders
Version Appenders give us the ability to append an arbitrary string to the version returned by Jira before it gets passed on to Maven.
We can setup appenders for both un-released and release builds.
In our case, we’re going to append the string “-SNAPSHOT” to all un-released builds so that Maven will can do it’s snapshot magic.
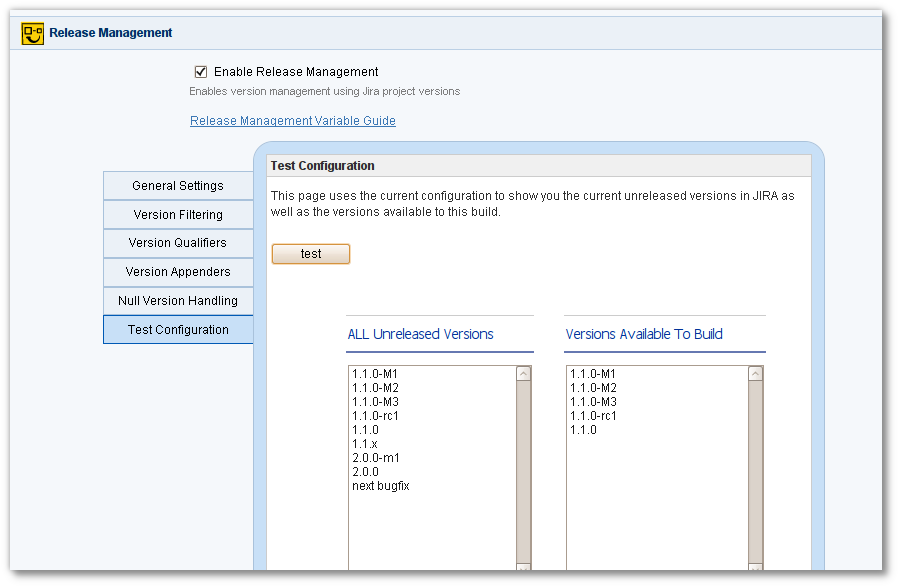
Testing the Configuration
The Test Configuration screen can be used at anytime while making edits to see which versions will be available to the plan at build time.
Simply click the test button and you’ll see a comparison of what’s setup in Jira and what’s available to this plan with the current settings.
Building Branches
Our branch plan configuration is now complete!
At this point, developers can commit against our fisrt versions branch (1.1.0-M1) and Bamboo will build just as it does any other plan.
There are only a few things left to point out.
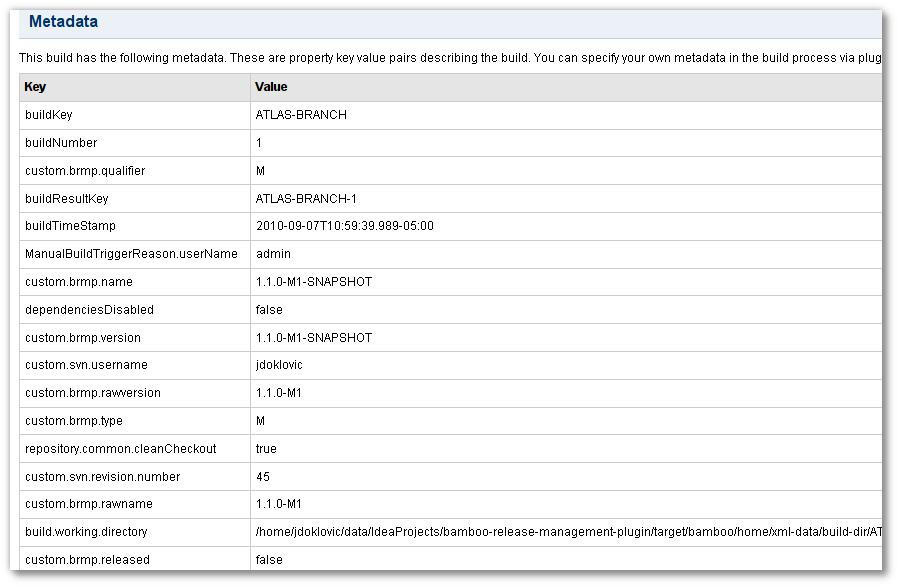
Metadata
After every build, we can use the Metadata tab of an individual build to see exactly which version BRMP received from Jira and some other details about the version.
The details include the raw label returned from Jira, the version label as it was passed to Maven including any appenders, any qualifiers it found, etc, etc.
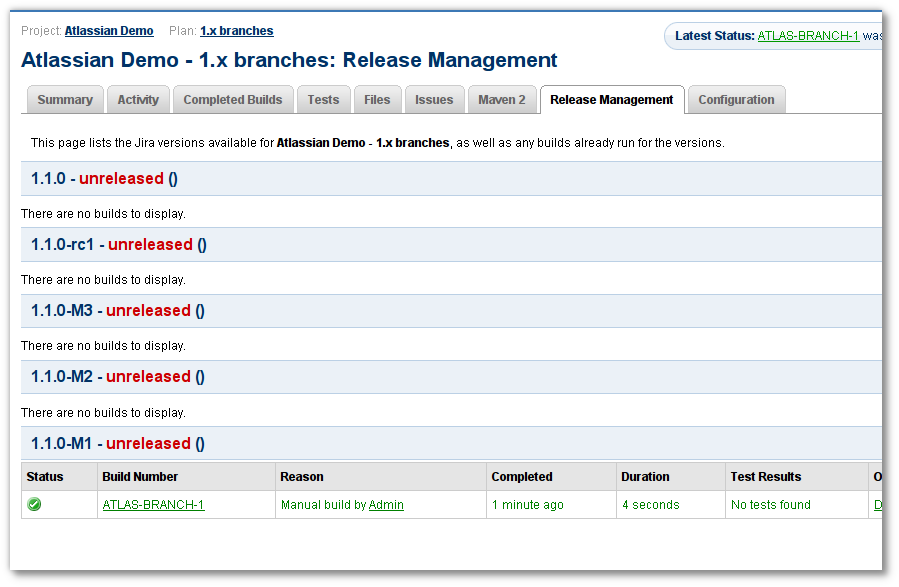
Release Management History
On the “Release Management” tab for any plan, you can see a history of builds broken down by version number.
For our branch plan which cannot run releases, this is useful to get a quick “health” of a specific version’s build plan.
Setting up the Trunk (Release) Plan
Now that we have the branch plan all working, it’s time to put the “release” in “release management”.
Luckily we can fast track this process by using Bamboo’s built-in cloning functionality.
Simply create a new plan in the same project as the branch plan and name it something like “1.x Trunk (release)”.
Choose the option to clone a plan and choose the branch plan as the one to clone.
Release SCM Settings
For our release plan, we want to change the SVN url to point to the trunk of the repository. This is done on the “Source Repository” tab.
Release Builder Settings
Since we cloned the branch plan, all of our Release Management settings are already setup for us.
We just need to make a single change on the General Settings tab: check “Allow Release Builds”
If we forget this step, we won’t be able to release anything.
Release Post Actions
BRMP provides a set of plugins that can be configured on the *Post Actions* tab of a Bamboo plan.
These weren’t needed for our branch plan, but they provide the “pixie dust” that will be used to make our release plan a bit more magical.
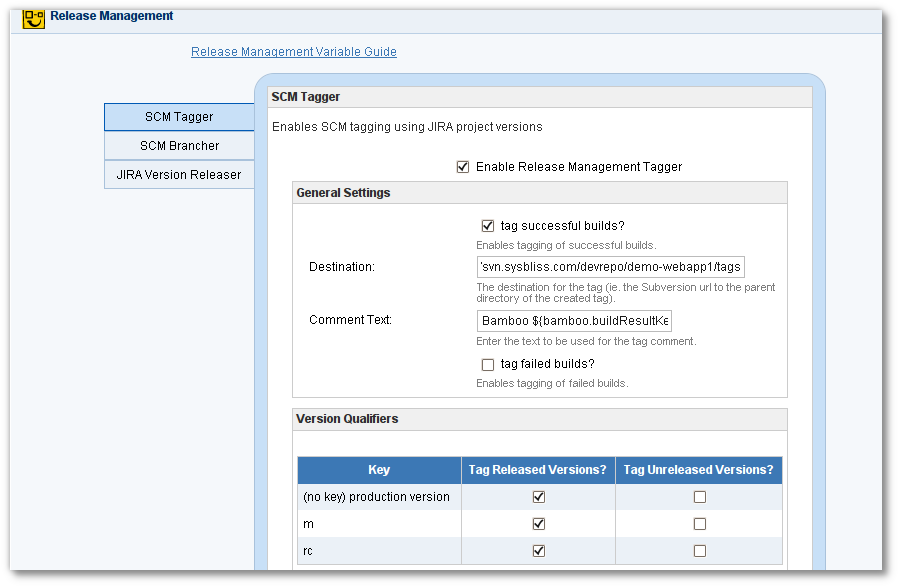
Tagging Builds
As we run release builds, we want to have them tagged in SCM when they are successfully released.
To do this we need to check the Enable Release Management Tagger box which will present us with various options for tagging.
Under the tagger’s “General Settings” section we want to check tag successful builds and provide it the location of the root tags directory.
Underneath the location field, we can optionally add a comment for the commit. In our case, we’ve added:
Bamboo ${bamboo.buildResultKey}
Which will allow us to identify which build key was tagged when we are looking at the repository with our SCM client.
Again, this is a variable exposed by BRMP.
The “Version Qualifiers” section allows us to get a little more granular with our tagging strategy.
For our purposes, we tell it to only tag release builds for every qualifier.
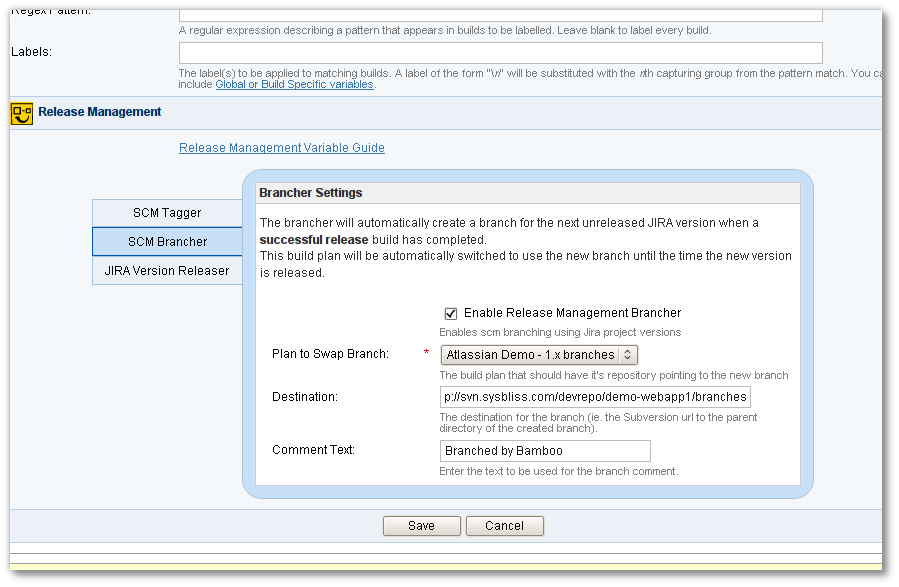
Branching Builds
After we have successfully built a release version, we want to create a new branch in SCM for the next version so our developers can continue on their way towards the final version.
This is done by checking the Enable Release Management Brancher box on the SCM Brancher tab.
But what about Bamboo?? Yes we want a new branch in SCM created, but we also need Bamboo to start using the new branch. On top of that, we are configuring the release plan, but we want the branch plan to use the new branch…
No Problem. Just select the branch plan in the Plan to Swap Branch dropdown.
This will tell Bamboo to change the SCM url of the *branch* plan to the new branch when the release build completes successfully.
The final 2 fields, much like the tagger screen, contain the url to the root of the branches and an optional comment.
Releasing in Jira
The final thing we need to accomplish is to release the version in Jira.
We also need to tell Bamboo what to do with any unresolved issues within the version we just released.
To do this, check the Enable Release Management Jira Releaser box and choose a move issue strategy from the dropdown.

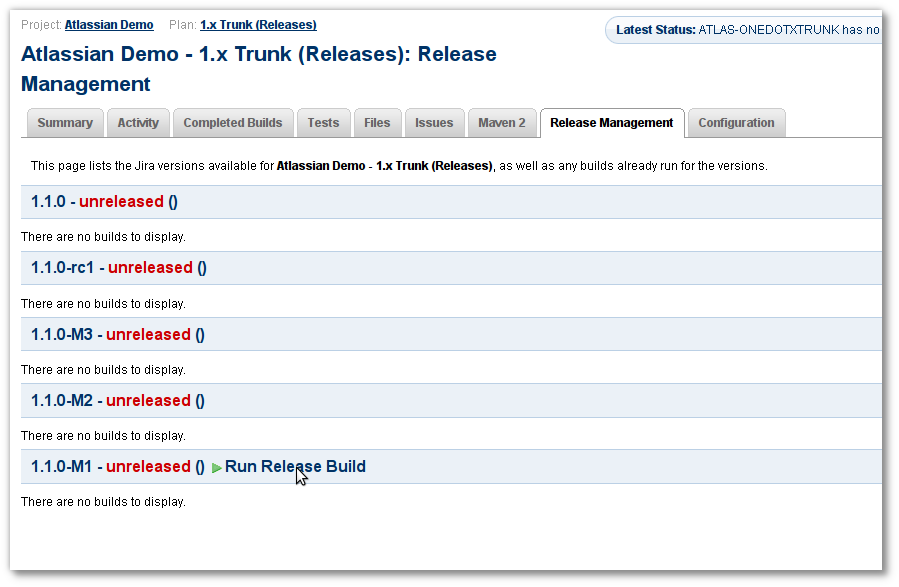
Building Releases
The day has come… version 1.1.0-M1 is feature complete and we need to do a release build.
First things first, being on the “Release Manager” team, we take responsibility for merging branches into the trunk.
Since our developers are top-notch and we are experts in our chosen SCM, this goes flawlessly and we’re ready to kick off the build.
Using the same Release Management tab as described above, only this time on the trunk plan, we see a new option appear: Run Release Build
Go ahead, click it. I dare you.
Once clicked, Bamboo will run the build and if it’s successful run all the post-actions we previously setup.
That’s it! We’ve just released our first version, and everything is already setup for development against the next version.
Although we’re going to spare you the boredom of going through the entire process again to illustrate parallel version development, just keep in mind that you could clone this entire tutorial and just change the version mask in the Builder Settings to 2.* and now you have complete lifecycles for 1.x and 2.x versions running in parallel!
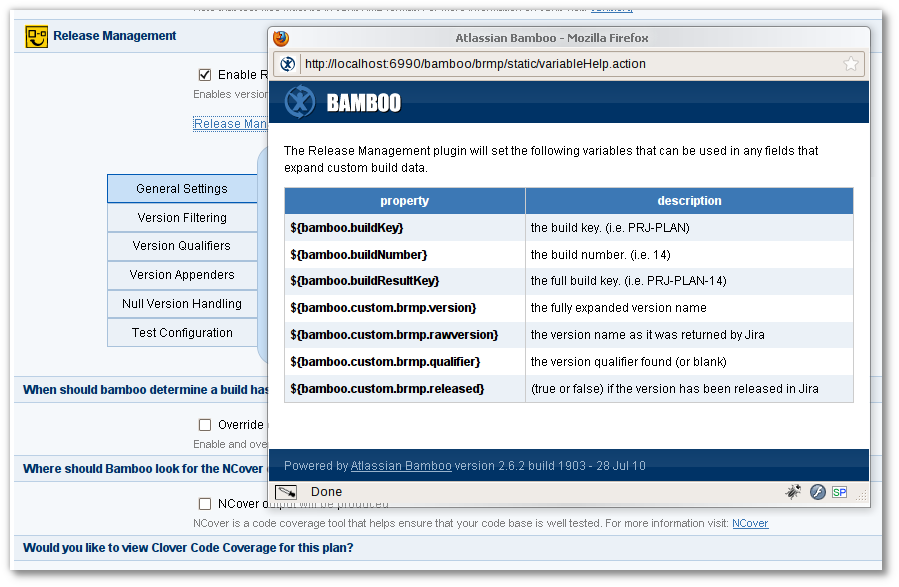
Variables
A few times throughout this document, we referred to variables that get set by BRMP that can be used in almost any text field within the Bamboo configuration.
At anytime you can easily access the list of variables for reference by clicking on the Release Management Variable Guide link within both the BRMP Builder and BRMP Post Action configuration screens.
This will launch a popup window with the list of variables available.
Learn More!
Read our documentation about the Bamboo Release Management Plugin.
New to Bamboo?
Download Bamboo to get started with a free 30-day trial.